
Cognito SSO Integration
Introduction
This guide offers a comprehensive walkthrough for configuring Biopass as an OpenID Connect (OIDC) Identity Provider within AWS Cognito. By doing so, you will enable Passwordless authentication for Cognito applications, also known as Relying Parties. The Passwordless authentication experience allows users to securely access these applications without needing to remember or enter passwords. By following this guide, you'll learn how to integrate Biopass with Cognito and enhance the user experience for your Cognito applications.
Prerequisites
To follow this guide, you should have:
An active AWS Cognito account with administrator access (You can sign up for a free trial too)
An active Biopass account with administrator access
An application (Relying Party), such as a web application, mobile app, or API, that utilizes Cognito for authentication through OIDC.
Create an OIDC Application in Biopass
1. Sign in to the Biopass Admin Dashboard
- Navigate to the Biopass Admin Dashboard and sign in using your Biopass administrator account.
- From the Dashboard, click on the "Applications" tab.
2. Create a new OIDC Application
- Click the "Add New Application" button.
- Choose "Regular Web Application".
- Fill in the "Application Name" field with a name for your application.
- Choose a "Policy".
- At this stage, the "Allowed Callback URL" for Okta is unknown; therefore, select a temporary URL. Once the Cognito configuration is complete, this field will be updated with the appropriate value.
- Click "Create" to proceed.

3. Add a Group to your Application
- Click the "Group" tab.
- Click the "Add Group" button.
- Choose a "Group".
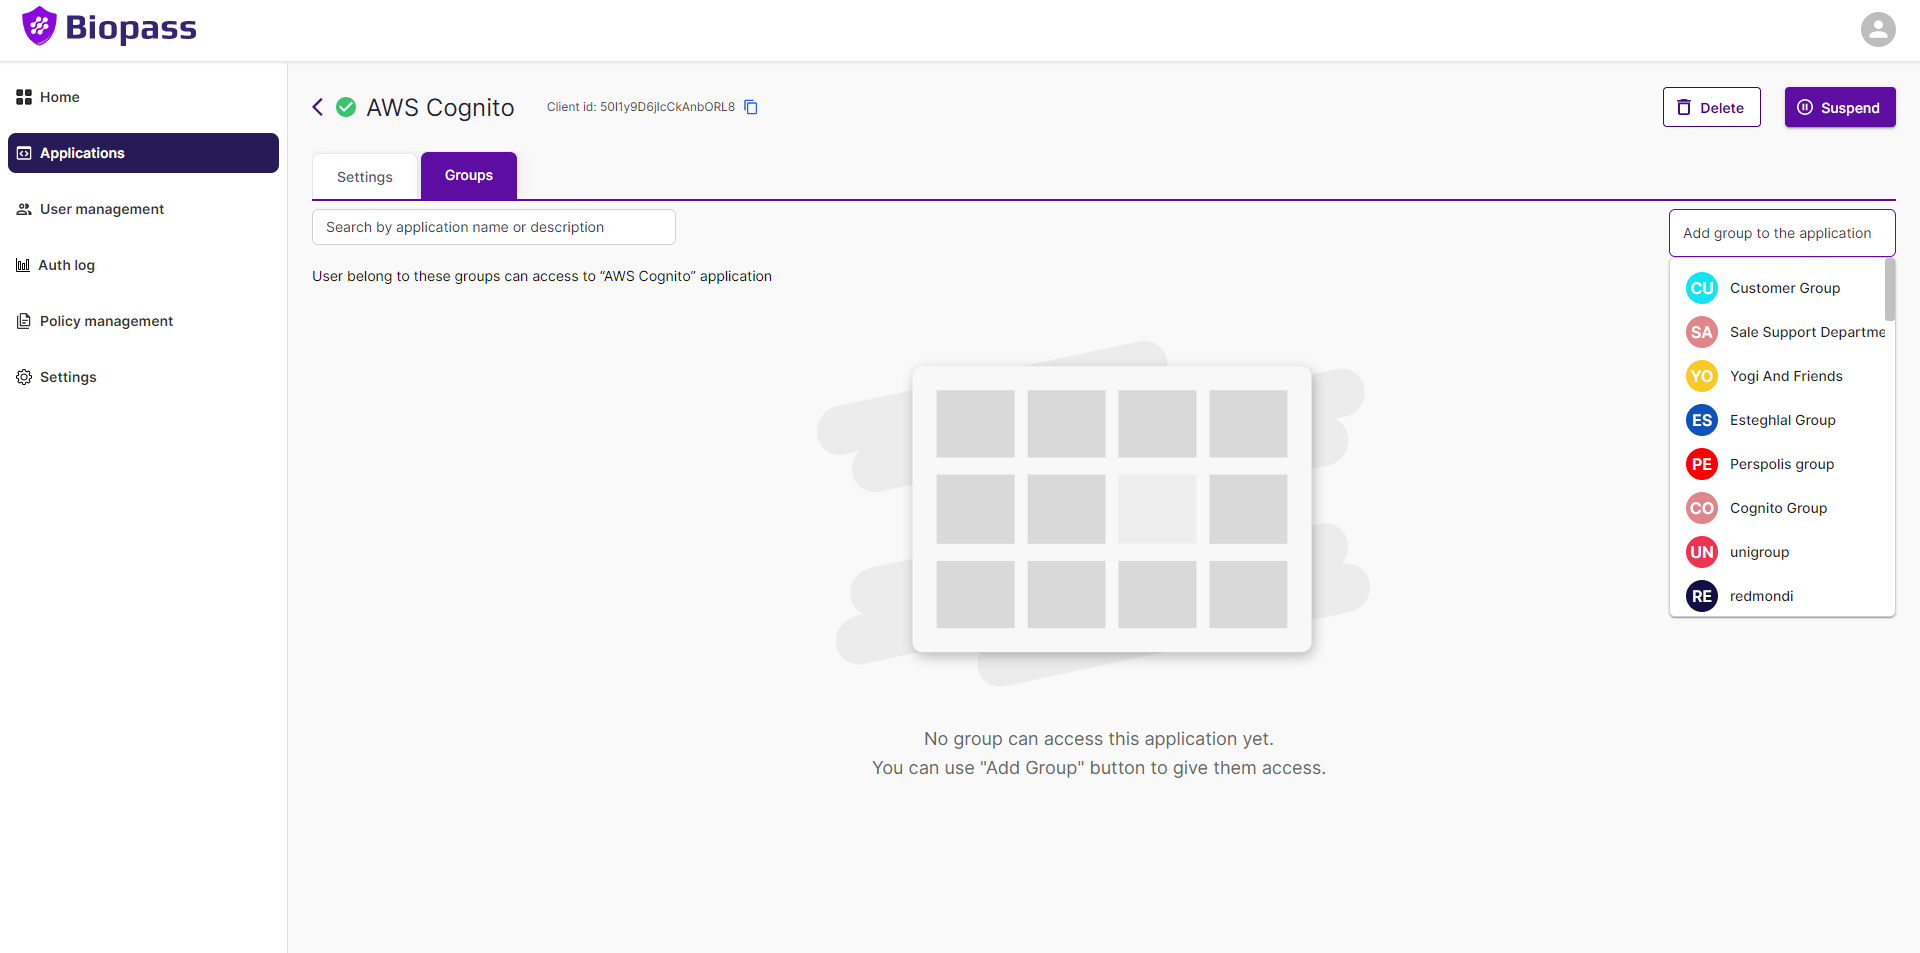
The button turns to a search bar, find the group you want in the list and click on it.
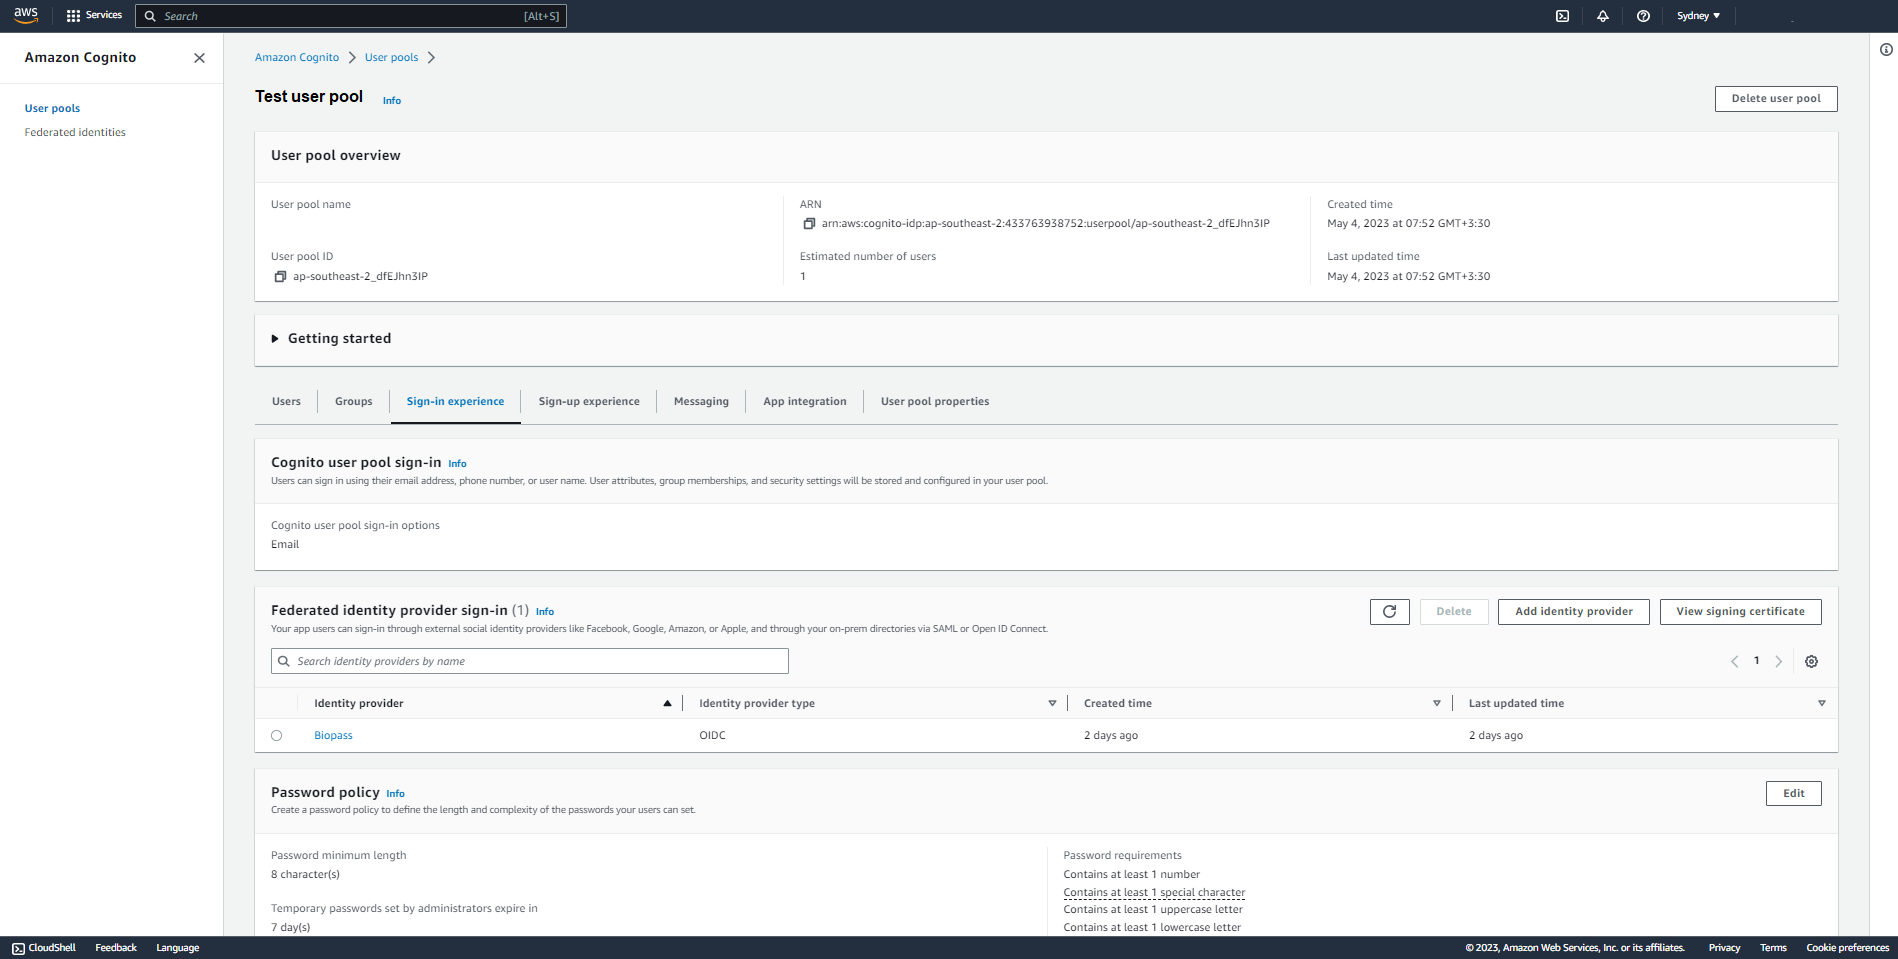
Add Biopass as an OIDC Identity Provider in Cognito user pool
1. Sign in to your AWS Cognito Console
- Create an AWS account or if you already have an active AWS account sign in to it
- Navigate to Cognito.
- Create a user pool or open a previously created user pool in Cognito (for more information on how to create a user pool read here here
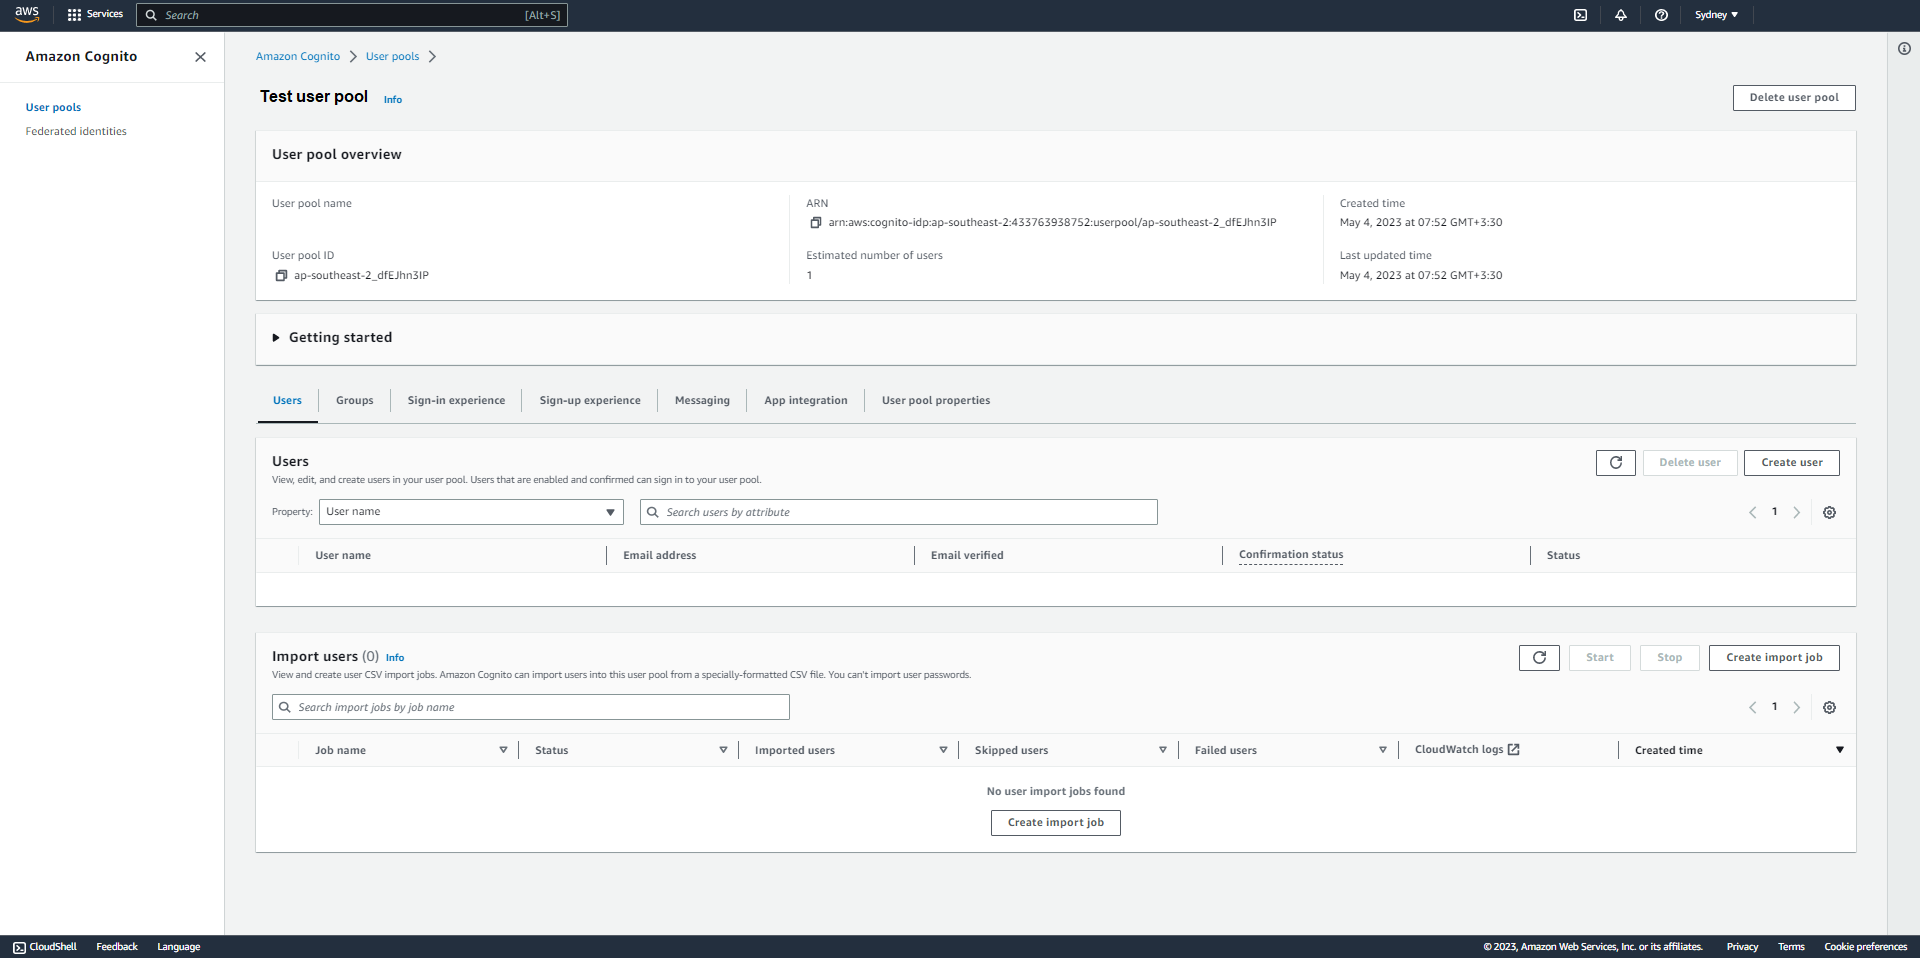
A Cognito user pool panel
2. Find "Add identity provider" button
- Click on the "Sign-in experience" tab.
- Under this tab, click on "Add identity provider" button in "Federated identity provider sign-in" section.
- When you click on it, a form is opened to input more information about your OIDC provider (Biopass) such as picture below.
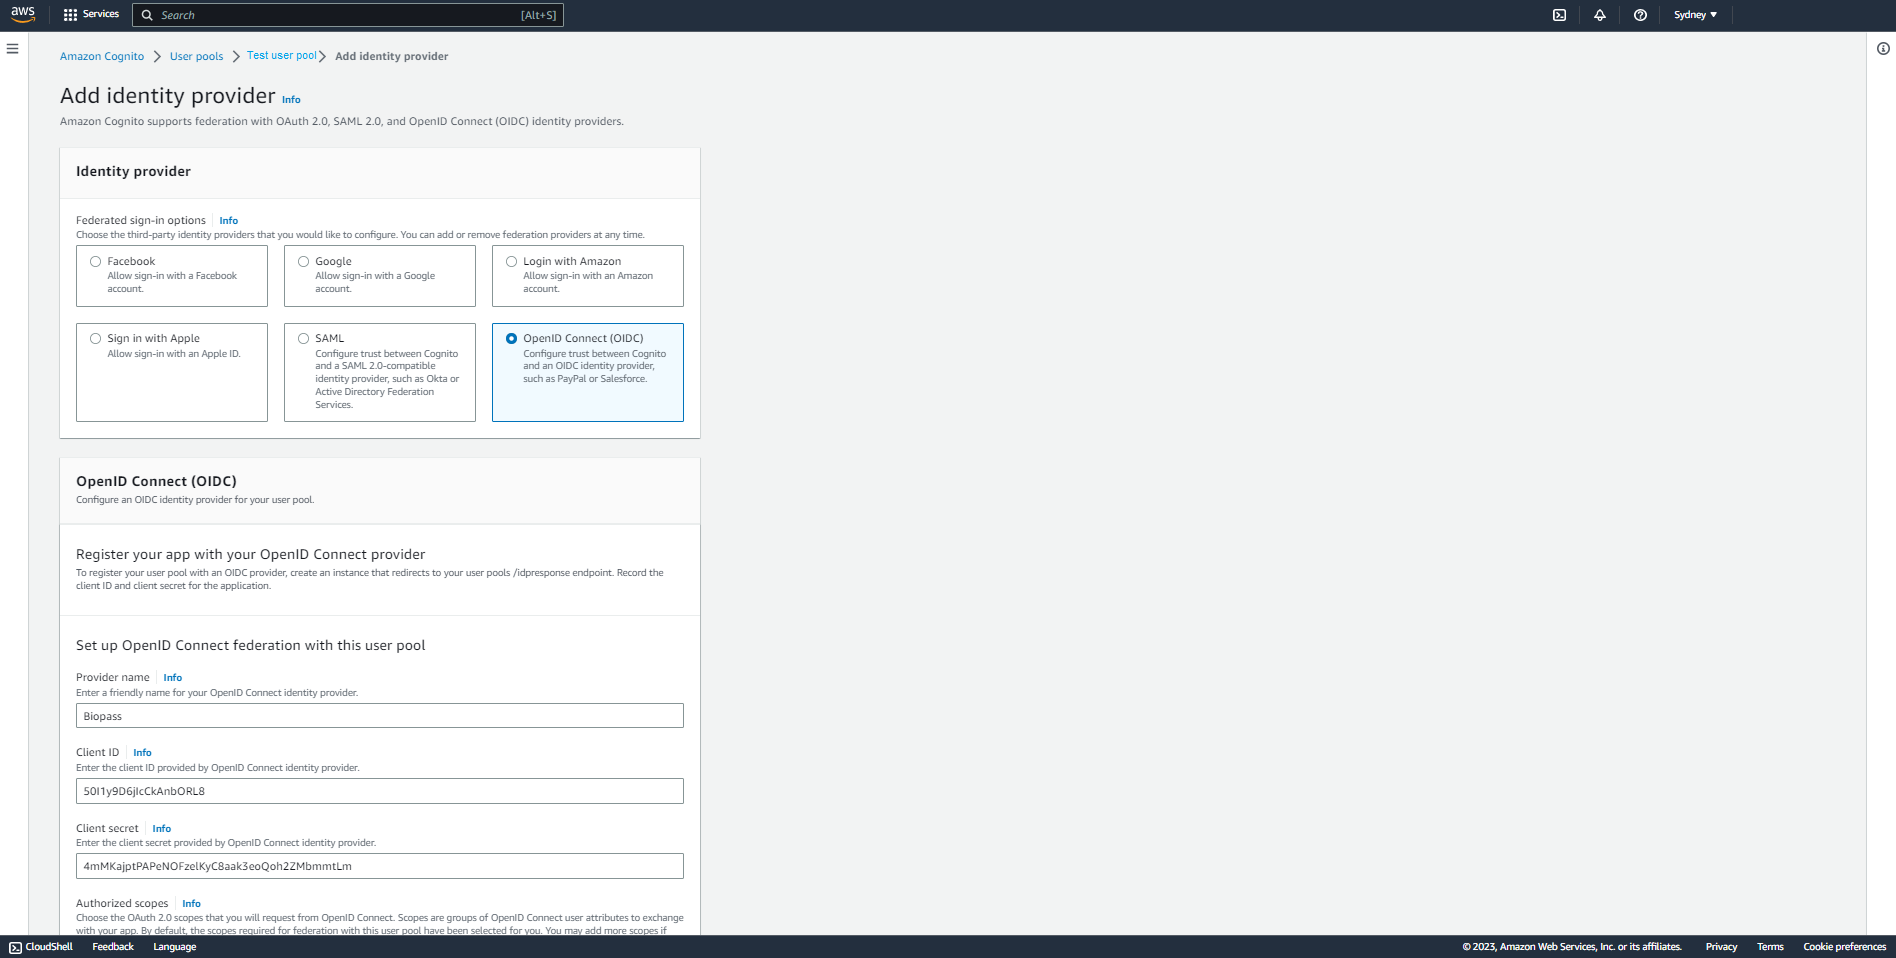
3. Enter general details for your identity provider
- On the page opened, choose the "OpenID Connect" type.
- Fill in the "Provider name" field with a desired name to refer to Biopass for example "Biopass".
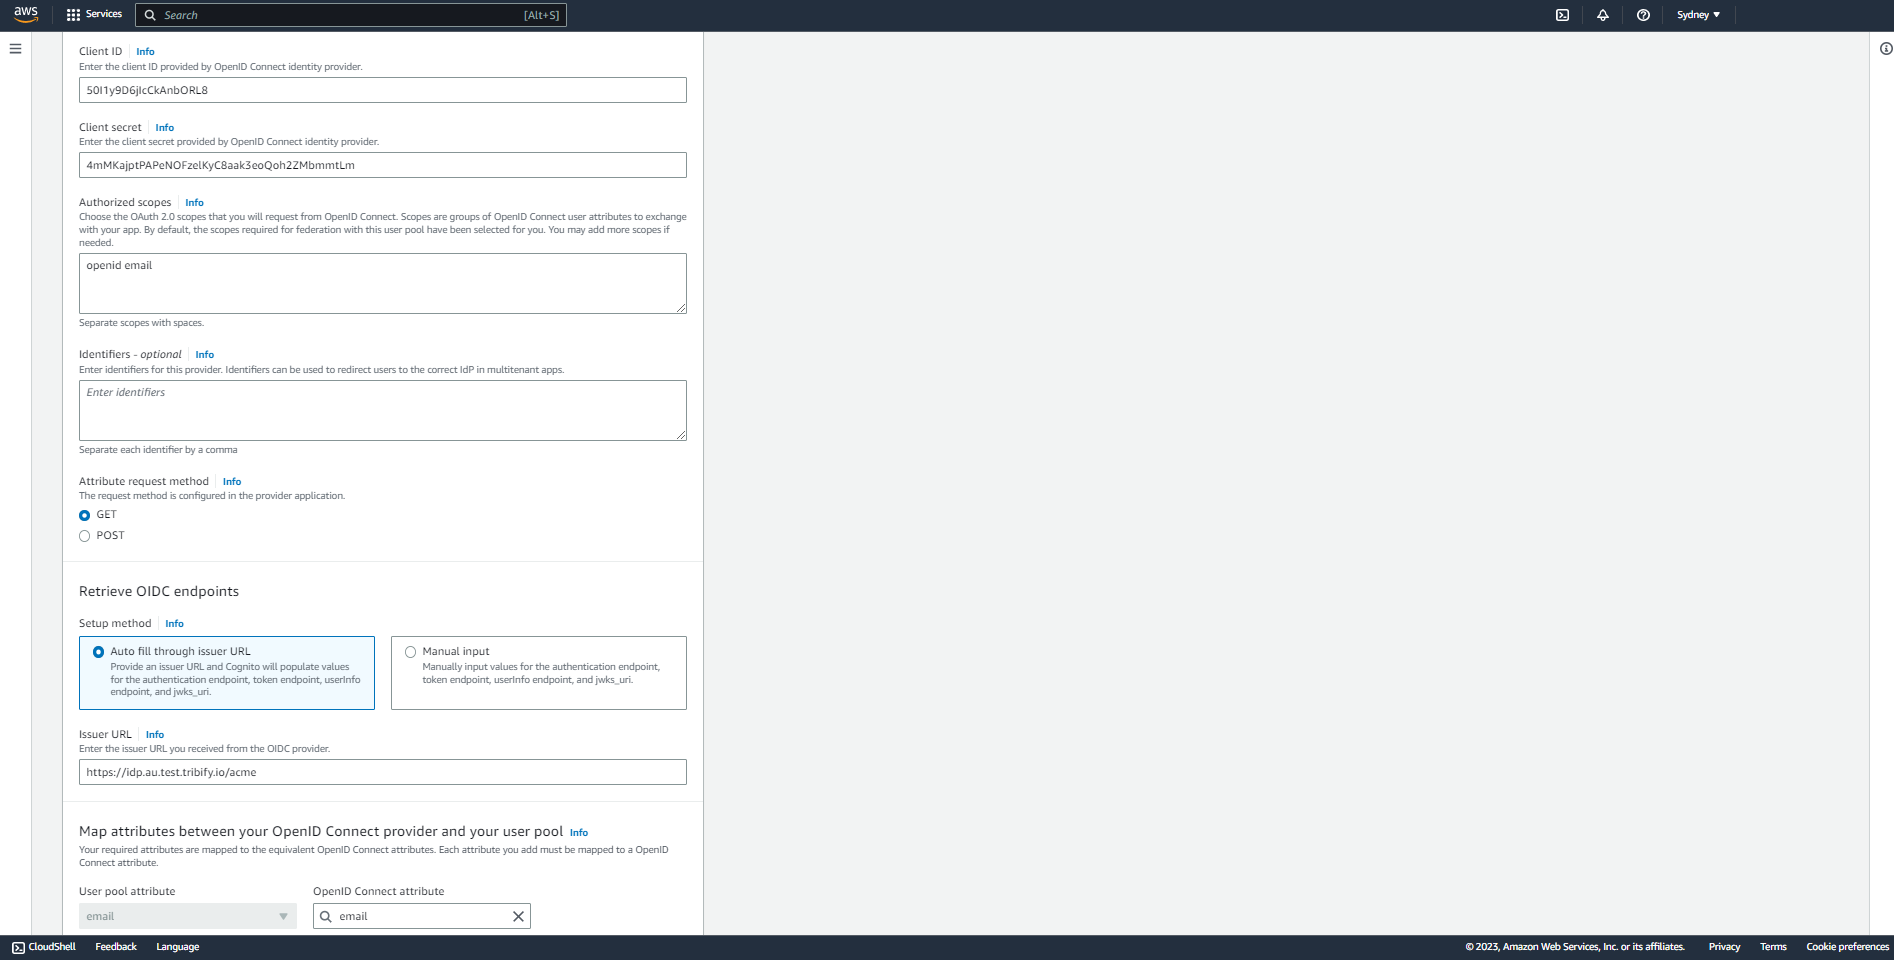
- Add "openid email" as "Authorized scopes".
- Choose "Get" as "Attribute request method".
- Choose "Auto fill through issuer URL" option as "Retrieve OIDC endpoints" method.
4. Obtain Biopass OIDC Application Credentials
- From the "Applications" tab in the Biopass Admin Dashboard, click on the name of the OIDC application you created in the first stage.
- Copy the "Client ID", "Client Secret", and "Issuer" values from the "Integration information" box under "Settings" tab.
5. Configure Client Details
- Fill in the "Client ID", "Client Secret" and "Issuer" fields with credentials from the previous step.
- Map the attributes and then click on "Add identity provider" button. As for this example user pool, "Cognito user pool sign-in options" is set to be email, the corresponding attribute in Biopass is chosen to be email.
6. Biopass is added as identity provider
You will see "Biopass" as the identity provider in "Federated identity provider sign-in" section under "Sign-in experience" tab.
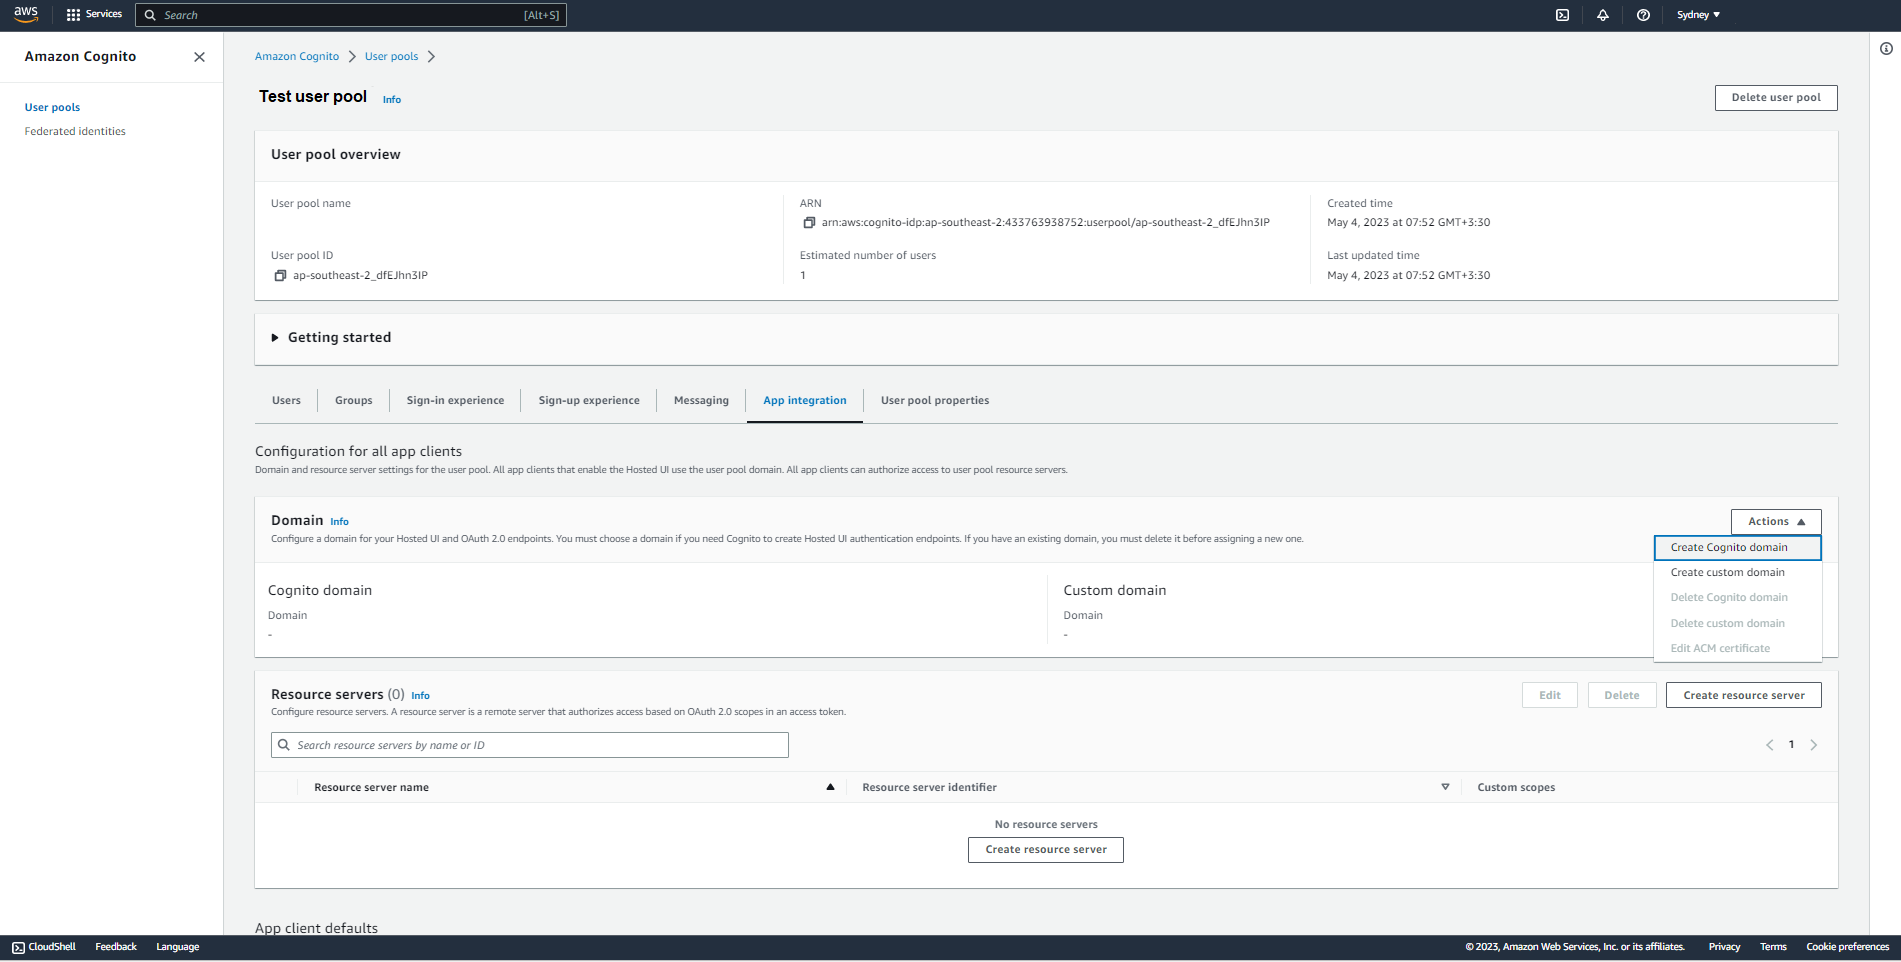
Configure Allowed Callback URL in Biopass Application
1. Obtain Redirect URI from Cognito
- Switch to "App integration" tab of the user pool.
- Click on "Action" button in "Domain" section under this tab.
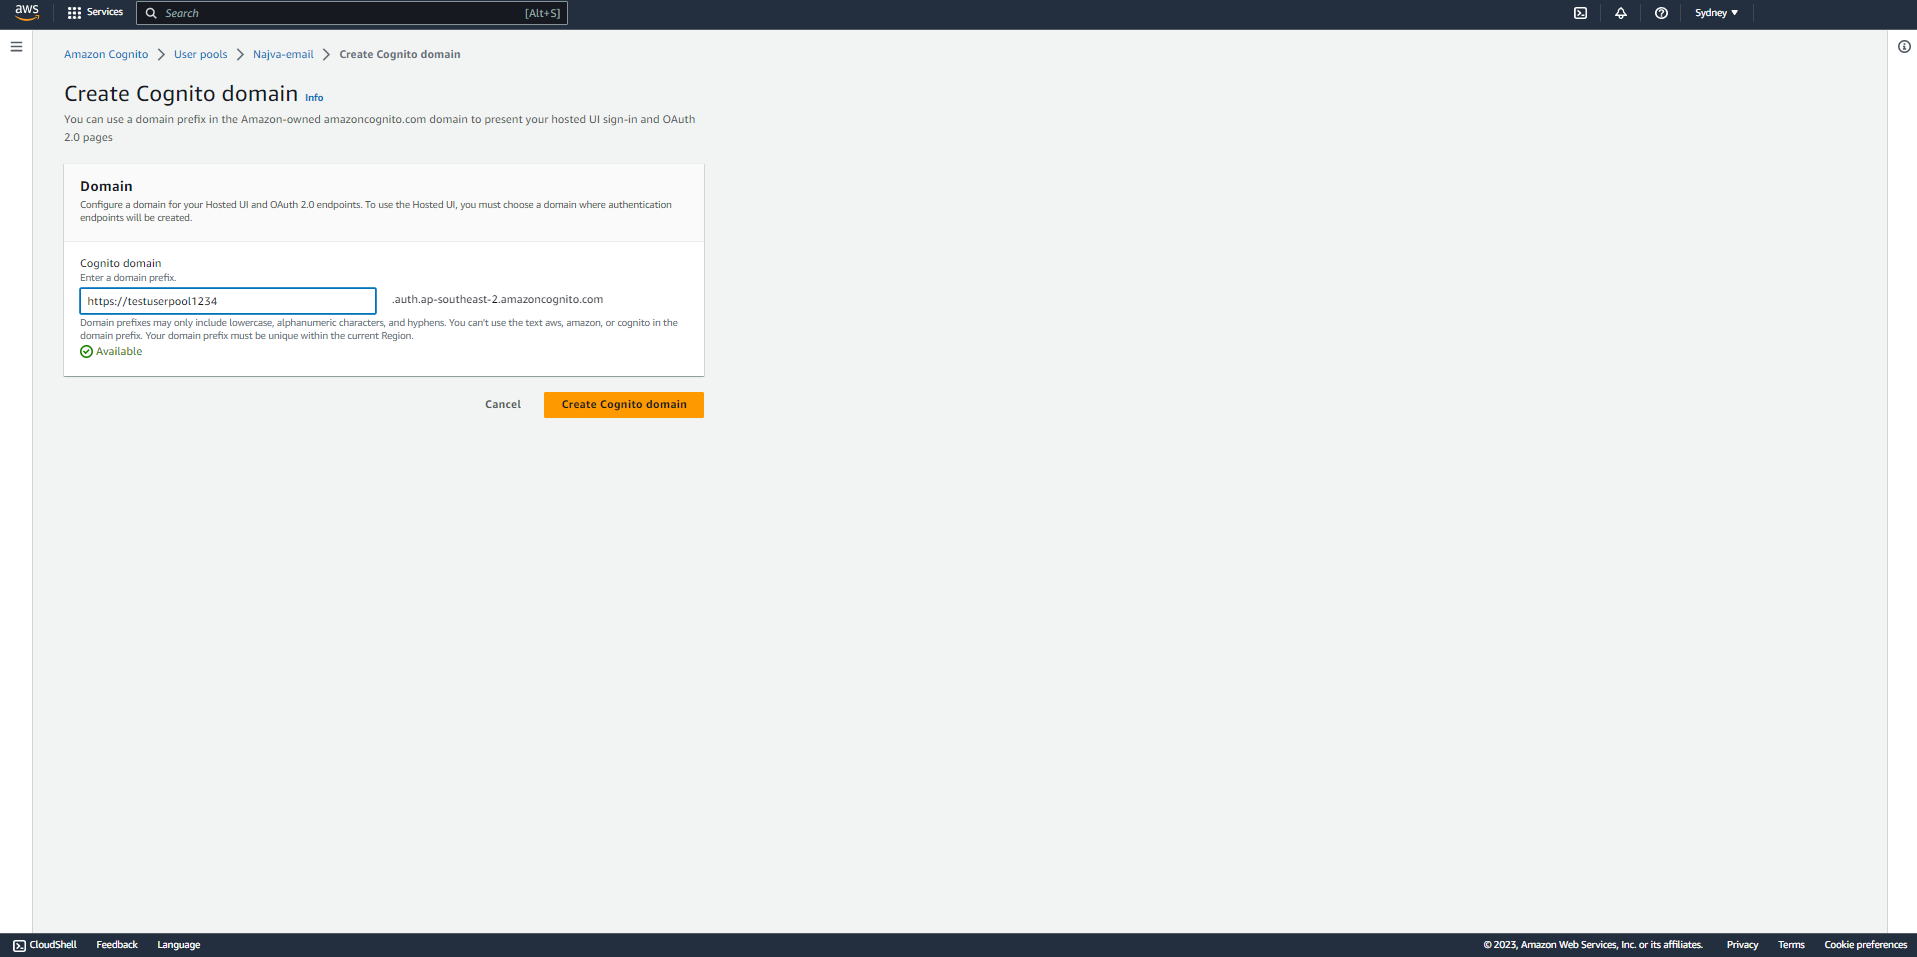
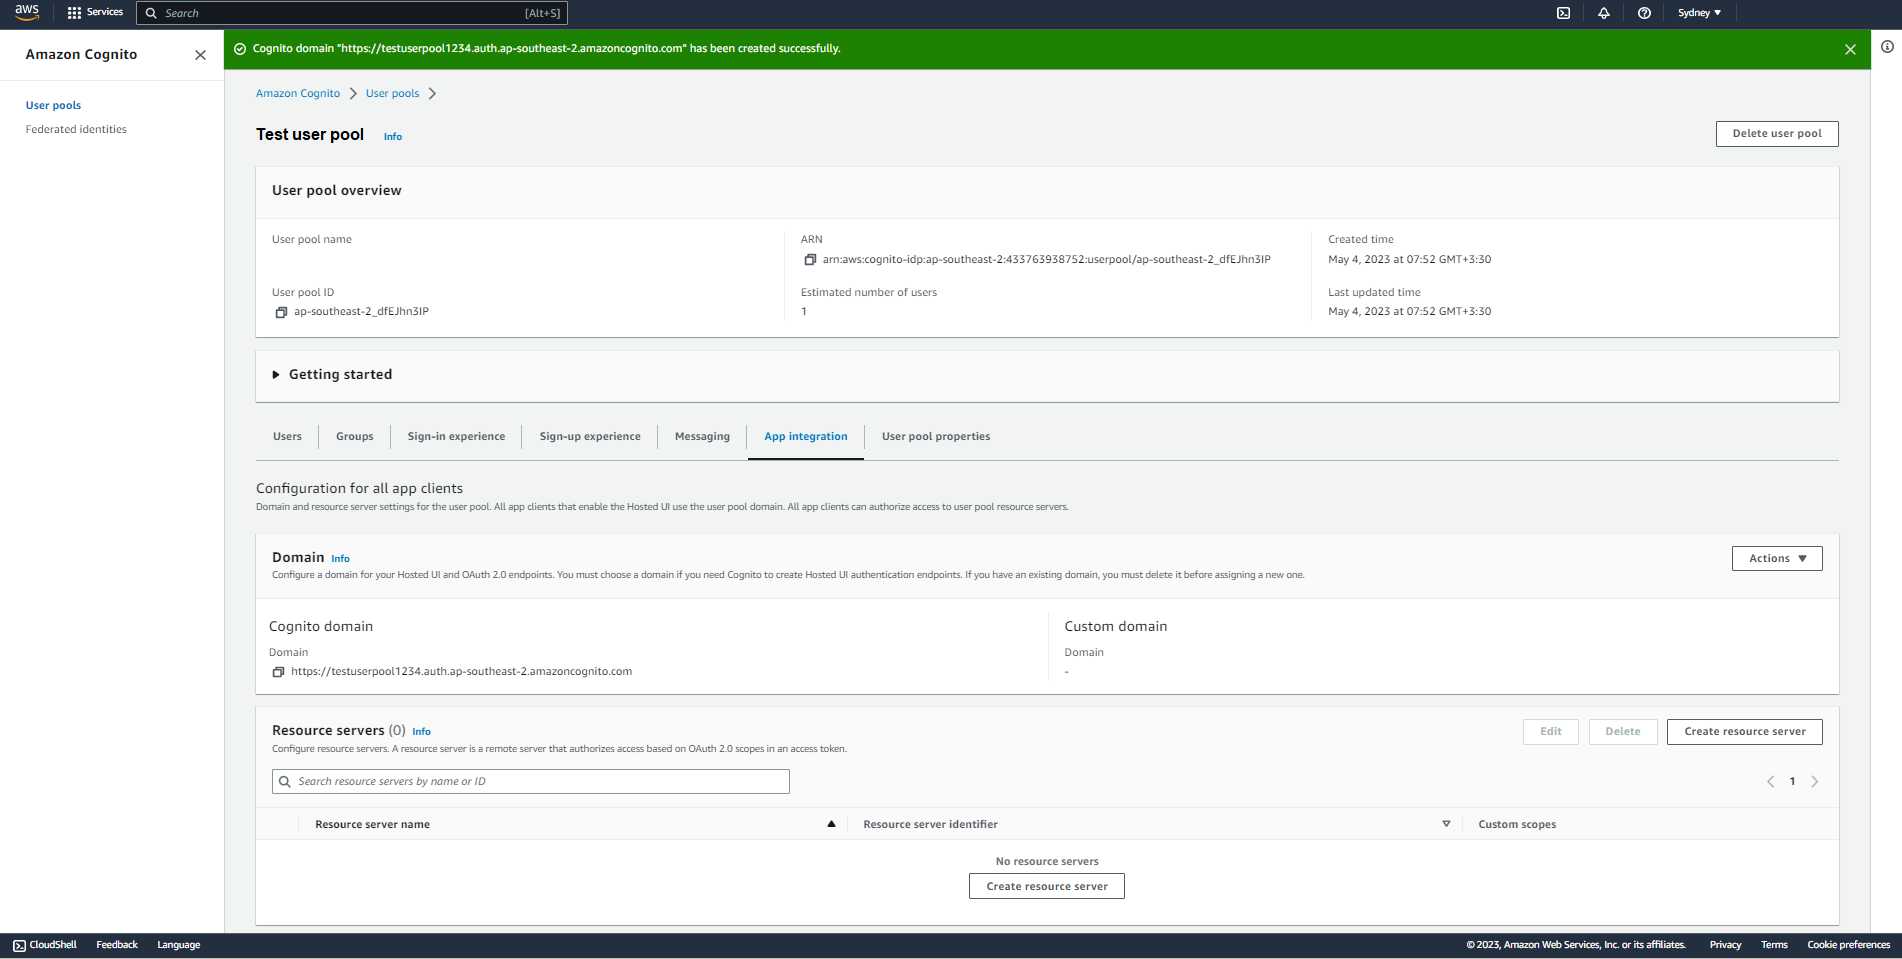
- Click on "Create Cognito domain" option.
- Choose a name for the domain and click on the button
2. Configure Biopass
-
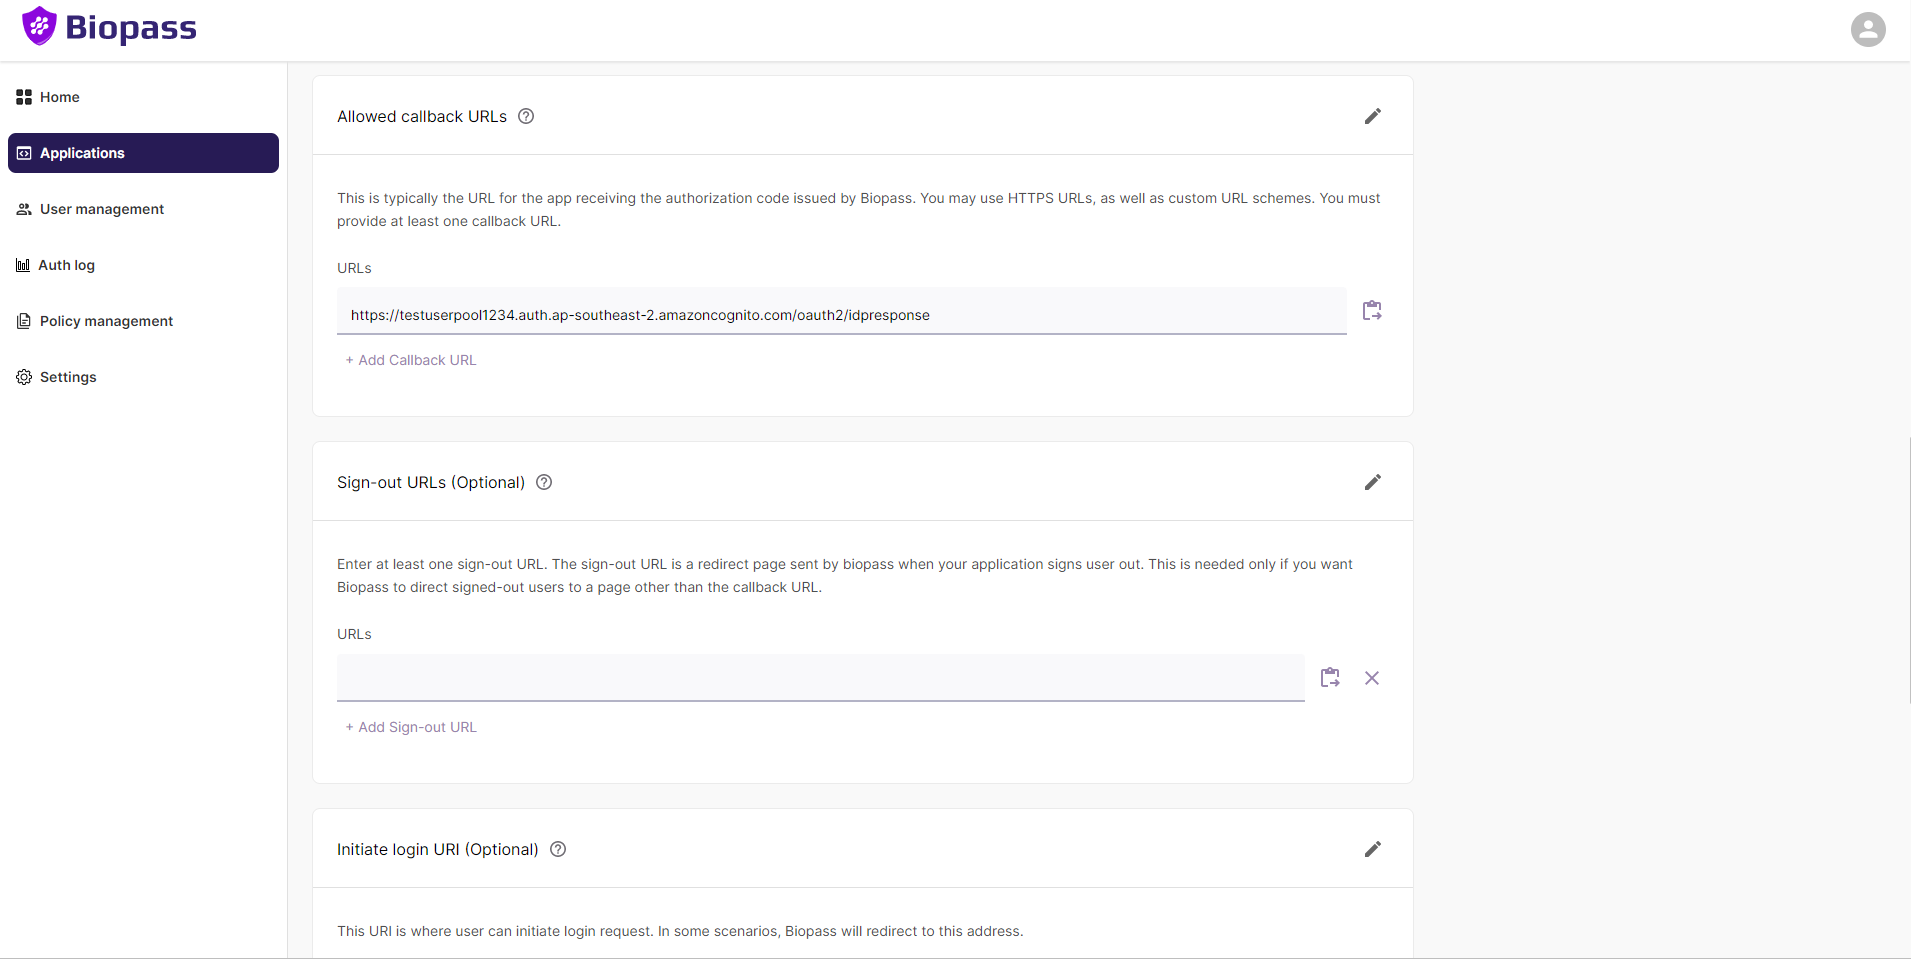
From the "Applications" tab in the Biopass Admin Dashboard, click on the name of the OIDC application you created.
-
Click Edit button (pen icon) in the "Allowed Callback URLs" section.
-
Click the "Add Callback URL" button.
-
Add the domain URL with the /oauth2/idpresponse endpoint in the field. This ensures that Biopass later accepts it from Amazon Cognito when it authenticates users.
- Click "Save" to proceed.
Test the OIDC Integration
Proceed to log in to your application using Cognito as you normally would. You should now be redirected to Biopass for Passwordless Authentication! Voila! 😃
Updated about 1 year ago